Visual Studio Code Tutorial (315 classroom)
使用 VSCode 環境
點擊兩下,打開桌面上的 Visual Studio Code。
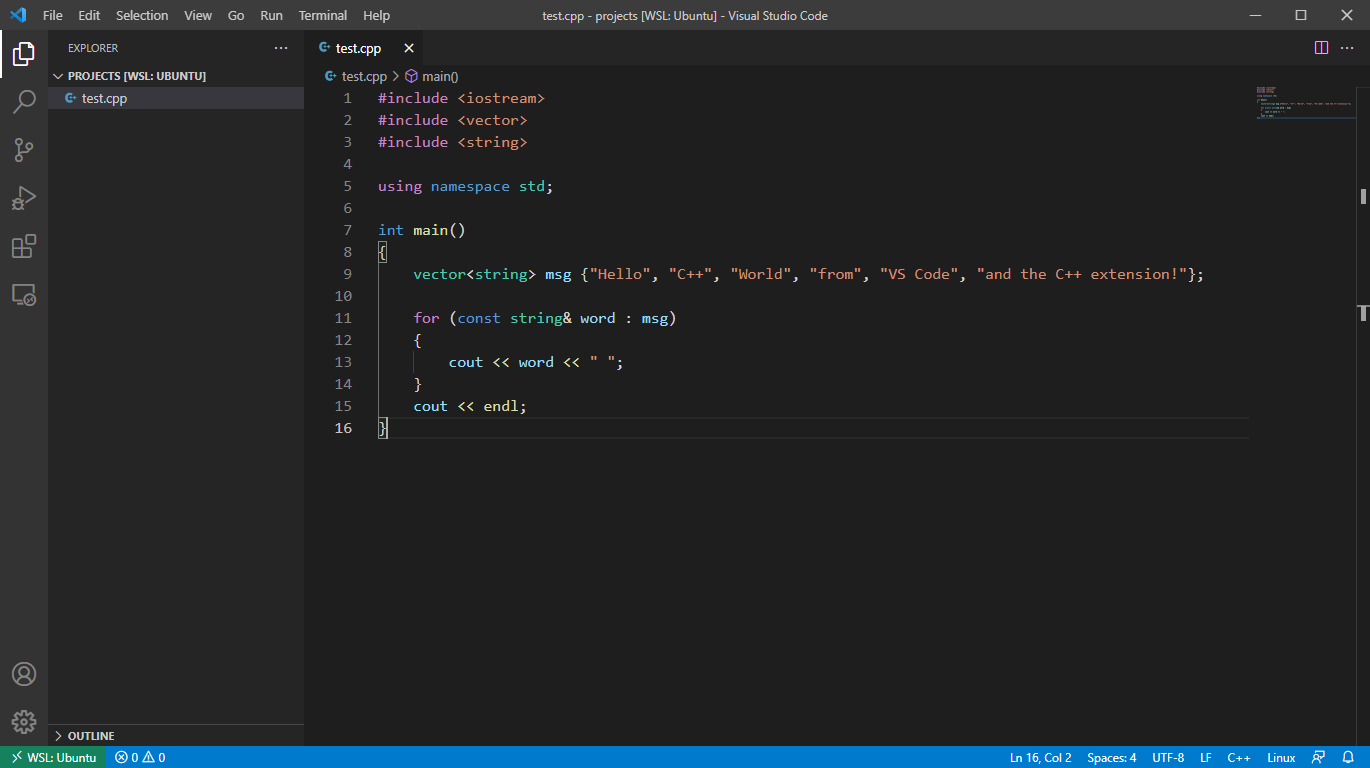
在文字輸入區輸入以下程式碼
#include <iostream>
#include <vector>
#include <string>

using namespace std;

int main()
{
    vector<string> msg {"Hello", "C++", "World", "from", "VS Code", "and the C++ extension!"};

    for (const string& word : msg)
    {
        cout << word << " ";
    }
    cout << endl;
}
編譯 & 執行 Hello world!
In VSCode: Terminal -> New Terminal
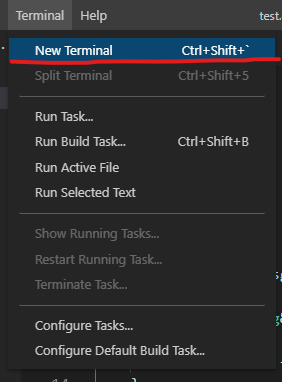
In VSCode Terminal:
$ g++ test.cpp
$ ./a.out
Hello C++ World from VS Code and the C++ extension!
$
測試編譯以及除錯
測試編譯
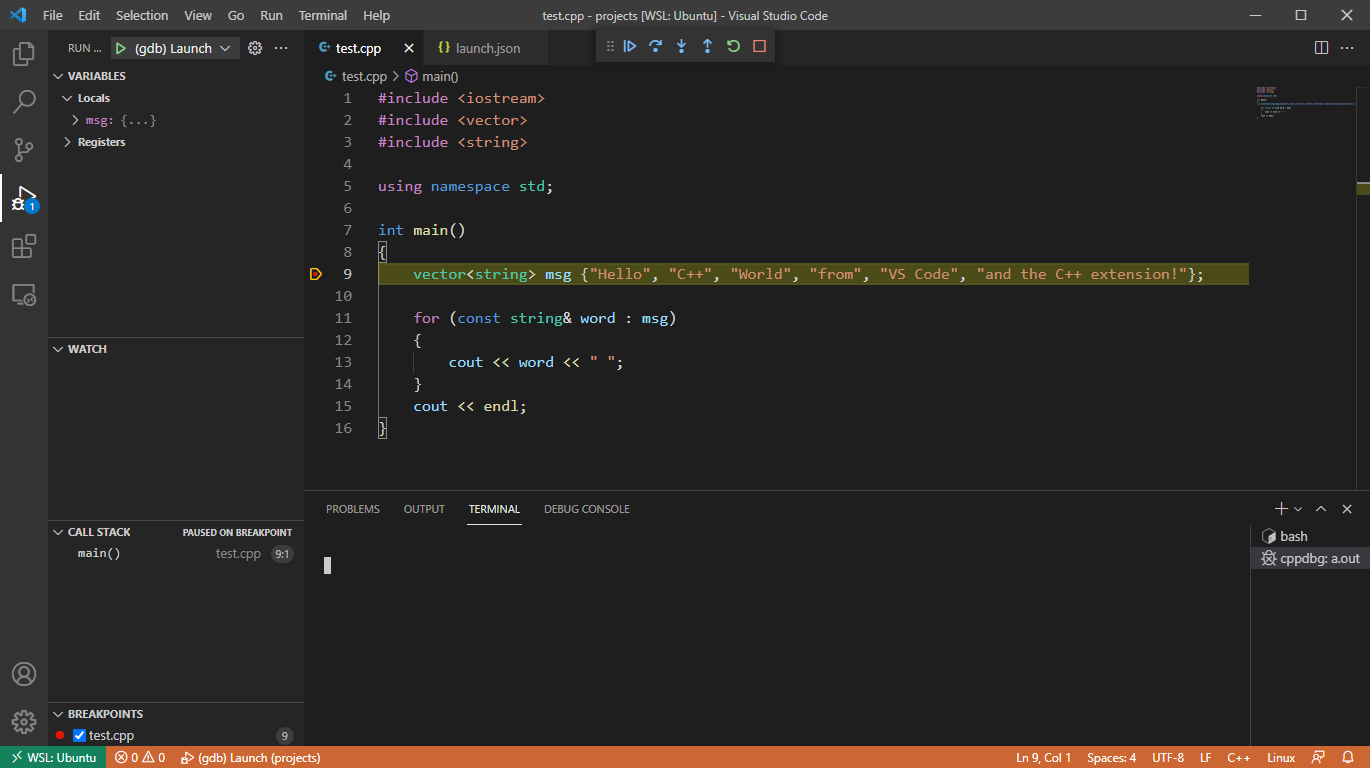
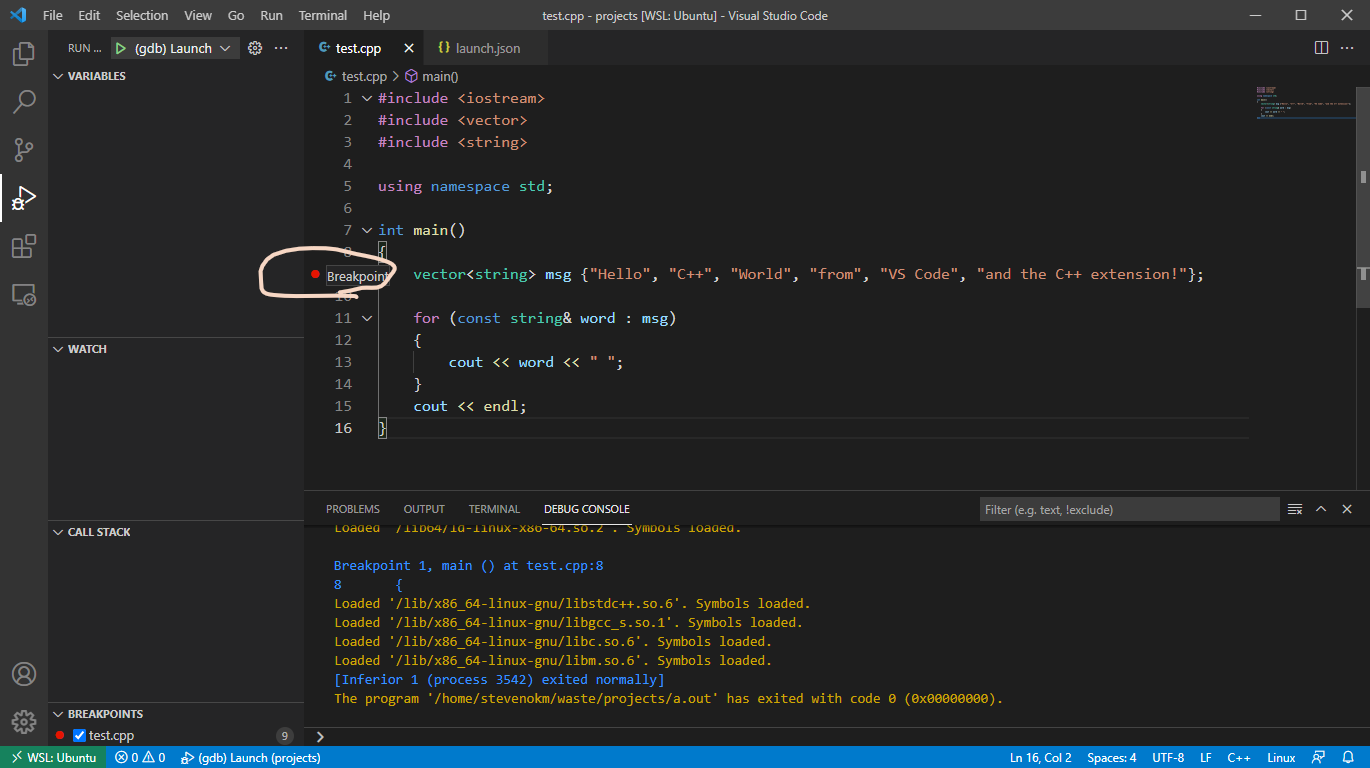
- 點擊左方test.cpp檔案後,在要中斷的程式碼行號左邊點一下,會出現紅點,如下圖示範:
- 按下
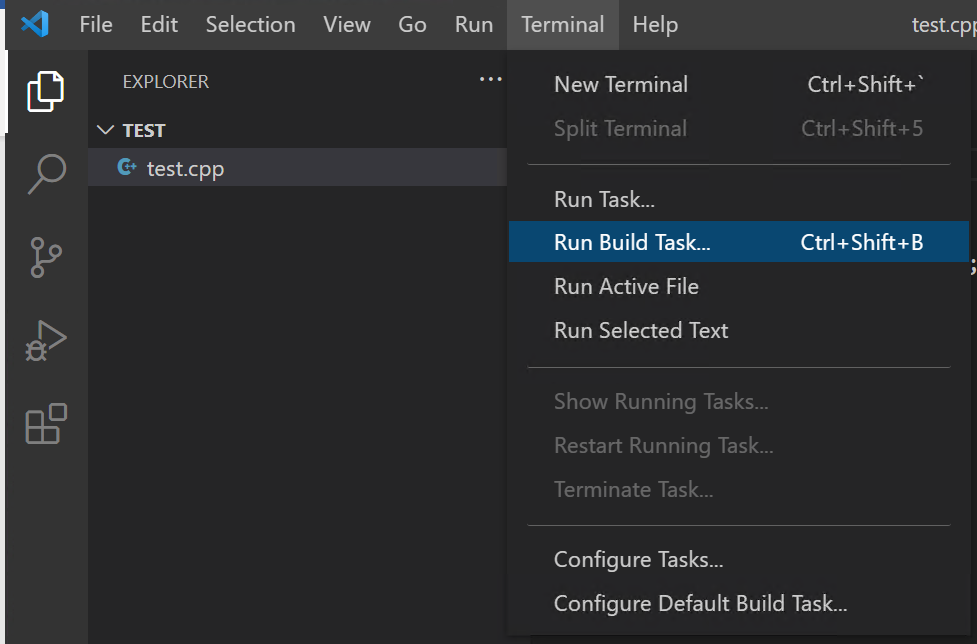
ctrl+shift+B按鍵,或上方terminal -> Run Build Task,如下圖示範:
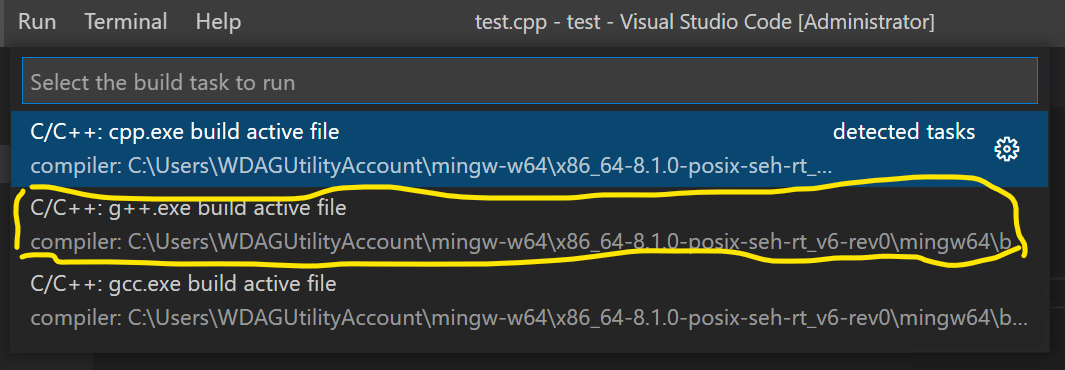
- 此時上方會出現以下畫面,選擇中間選項使用 g++ 編譯檔案,如下圖示範:
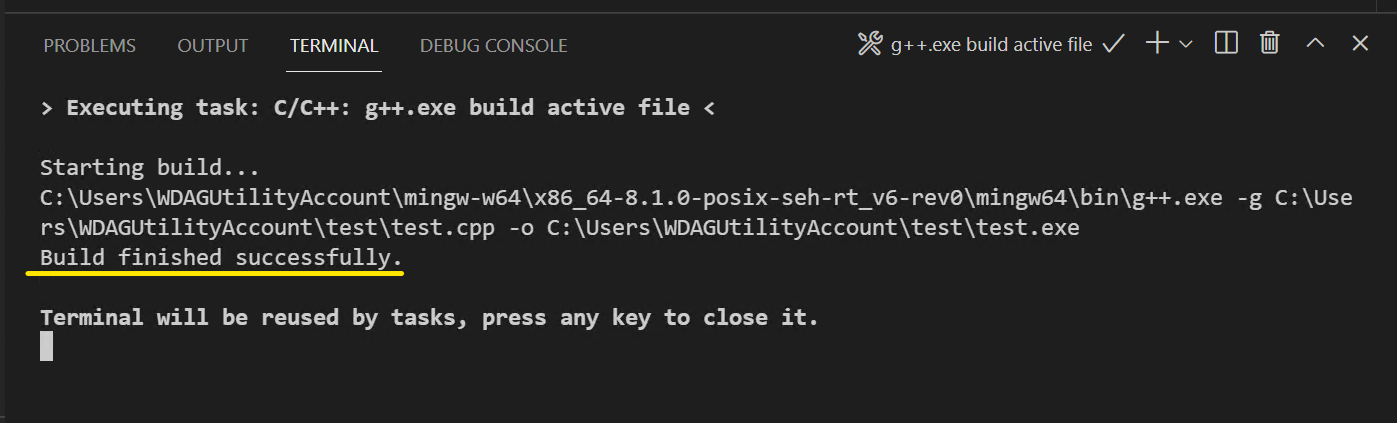
- 設置正確的話,此時下方會出現編譯成功完成的提示,如下圖示範:
測試除錯
-
完成前項
測試編譯的所有流程 -
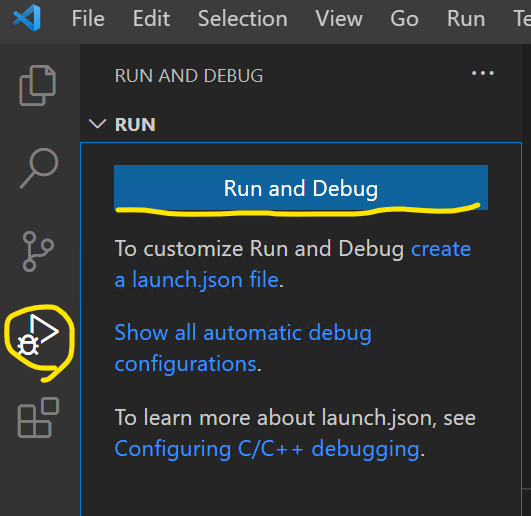
按下左方三角形按鈕後選擇
Run and Debug,如下圖示範:
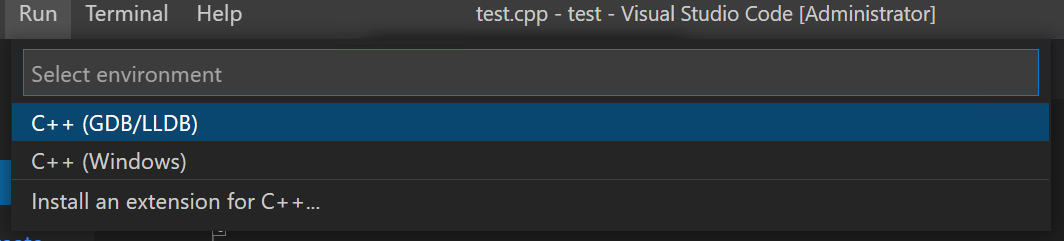
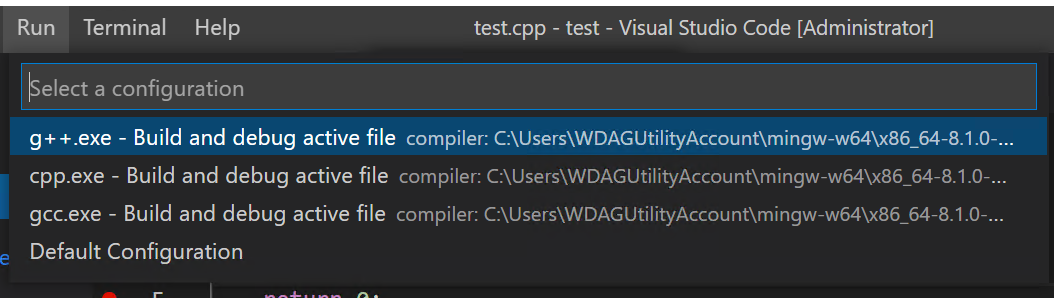
- 此時上方會依序出現相關提示,選擇預設的即可,如下圖示範:
- 若設定正確的話,會看到程式停留在選取的那一行,如下圖示範: