Visual Studio Code Tutorial (WSL/windows + mingw)
設定 VSCode 環境 (WSL)
NOTE: 安裝教學影片 WSL Tutorial
安裝 WSL & GCC
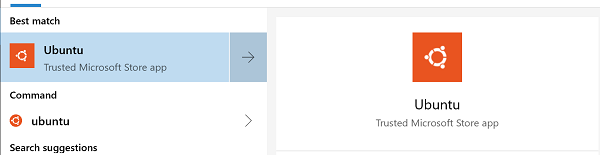
Install WSL: https://docs.microsoft.com/en-us/windows/wsl/install
啟動 WSL Ubuntu
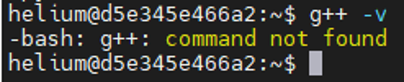
在 WSL Ubuntu 輸入以下指令:
sudo apt update
sudo apt install -y build-essential g++ gdb
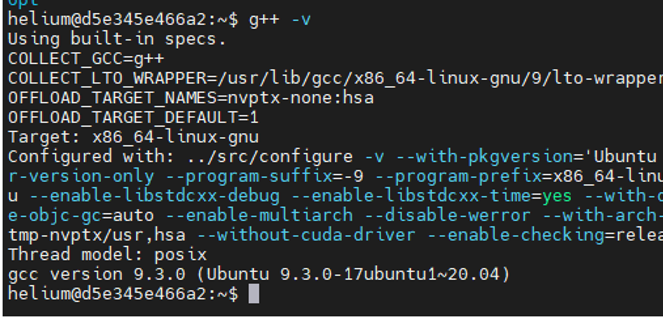
g++ -v
Wrong:
Correct:
安裝 VSCode & Remote - WSL plugin
Install VSCode: https://code.visualstudio.com/docs/setup/windows
Install the Remote - WSL extension for VSCode: https://marketplace.visualstudio.com/items?itemName=ms-vscode-remote.remote-wsl
新增專案 (Hello world!)
重新打開 WSL Ubuntu 並輸入以下指令:
$ mkdir projects
$ cd projects
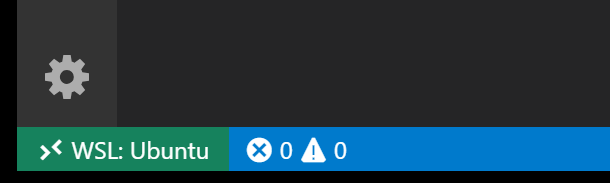
$ code .
Correct:
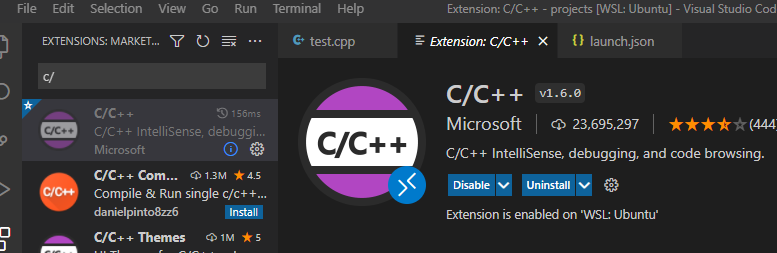
安裝 WSL C++ plugin
Install the C++ extension for VSCode: https://marketplace.visualstudio.com/items?itemName=ms-vscode.cpptools
Correct:
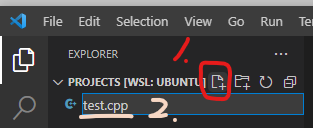
In VSCode: Exploer -> New File
輸入 test.cpp
在文字輸入區輸入以下程式碼
#include <iostream>
#include <vector>
#include <string>

using namespace std;

int main()
{
    vector<string> msg {"Hello", "C++", "World", "from", "VS Code", "and the C++ extension!"};

    for (const string& word : msg)
    {
        cout << word << " ";
    }
    cout << endl;
}

編譯 & 執行 Hello world!
In VSCode: Terminal -> New Terminal

In VSCode Terminal:
$ g++ test.cpp
$ ./a.out
Hello C++ World from VS Code and the C++ extension!
$
Debugger
可以設置中斷點,方便程式除錯。
launch.json
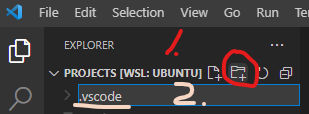
In VSCode: Exploer -> New Folder
輸入 .vscode
In VSCode: Exploer -> New File
輸入 launch.json
在文字輸入區輸入以下設定檔
{
    "version": "0.2.0",
    "configurations": [
        {
            "name": "(gdb) Launch",
            "type": "cppdbg",
            "request": "launch",
            "program": "${workspaceFolder}/a.out",
            "args": [],
            "stopAtEntry": false,
            "cwd": "${workspaceFolder}",
            "environment": [],
            "externalConsole": false,
            "MIMode": "gdb",
            "setupCommands": [
                {
                    "description": "Enable pretty-printing for gdb",
                    "text": "-enable-pretty-printing",
                    "ignoreFailures": true
                }
            ]
        }
    ]
}
編譯 & 執行 Debugger
In VSCode Terminal:
$ g++ -g test.cpp
$
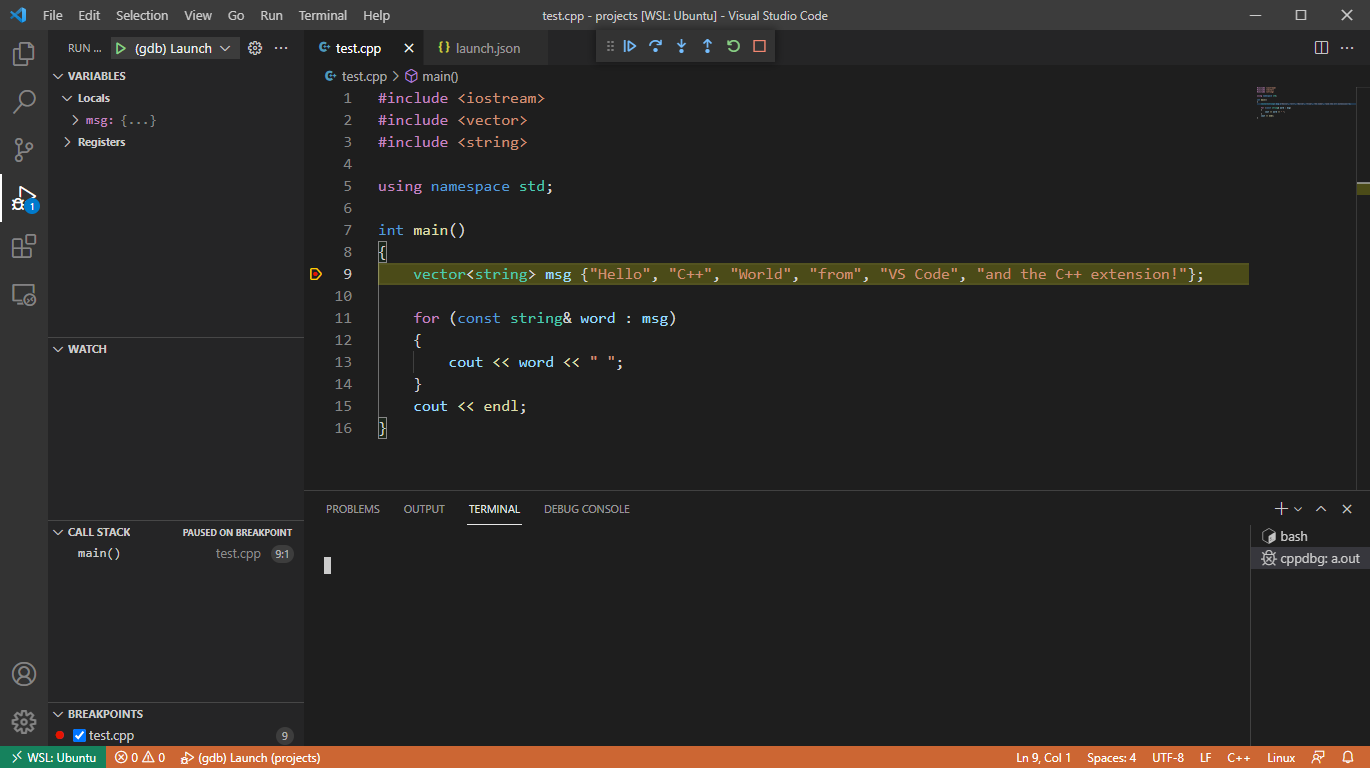
插入中斷點
在要中斷的程式碼行號左邊點一下

In VSCode: Run -> Start Debugging F5

設定 VSCode 環境 (Windows + mingw)
Modified from: CNOCycle/cpp_tutorial by E. Chen
安裝步驟
- 安裝 Scoop.sh
- 安裝
mingw cmake - 重新開啟 VSCode
圖解說明
安裝 Scoop.sh
In VSCode: Terminal -> New Terminal
在 VSCode Terminal 中輸入:
Invoke-Expression (New-Object System.Net.WebClient).DownloadString('https://get.scoop.sh')
或簡易版指令
iwr -useb get.scoop.sh | iex
Note:
如果遇到錯誤 (execution policy),可能需要使用以下指令更改執行策略後重新執行安裝指令:
Set-ExecutionPolicy RemoteSigned -scope CurrentUser
如果遇到 "無法建立 SSL/TLS 的安全通道。" 問題,可能需要使用以下指令更改系統的 SSL 設定:
[System.Net.ServicePointManager]::SecurityProtocol = "tls12, tls11"
如果遇到 7zip 安裝失敗,可以先安裝 7zip 再安裝 mingw,以下是指令:
scoop install 7zip
scoop install mingw
安裝 mingw cmake
在 VSCode Terminal 中輸入:
scoop install mingw cmake
Note: 安裝完成後須重新啟動 VSCode 才能生效
測試編譯以及除錯
測試編譯
- 在
%USERPROFILE%中新增一個資料夾,名稱可以自由取 (如test)。
Note: 所有的路徑 (包含 %USERPROFILE%) 都不能有非英文的字元,否則 Debugger 會無法執行。
也可以在 %USERPROFILE% 外的資料夾中新增資料夾,如 D:\test。

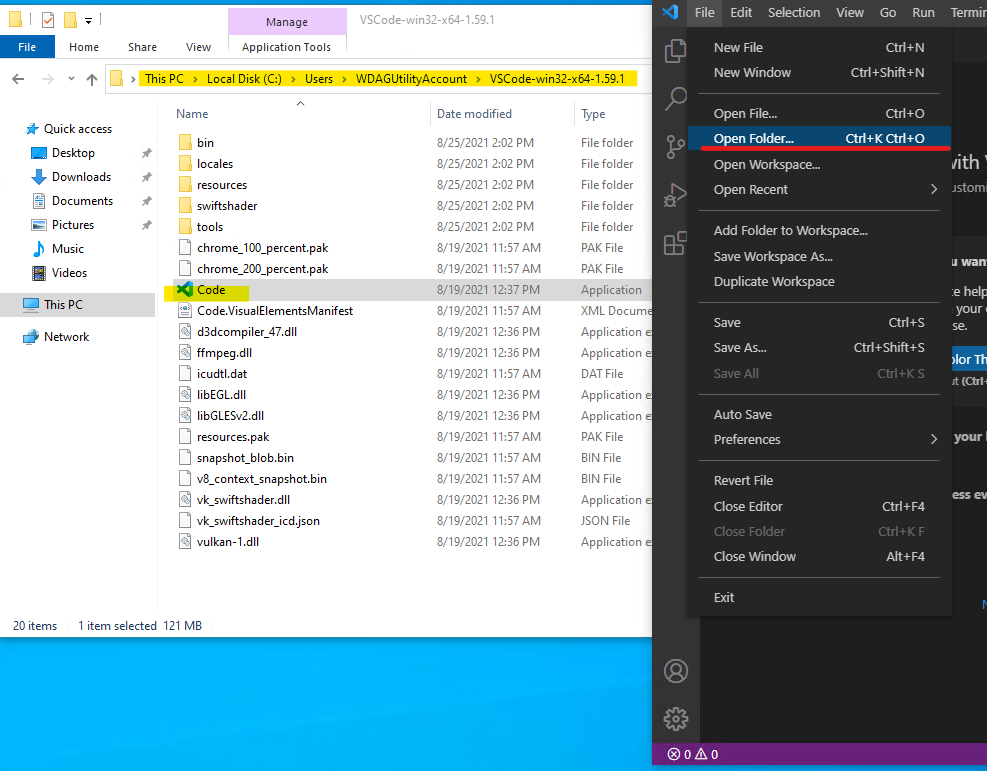
- 用
vscode編輯器選擇開啟新增的資料夾 (以test為例),如下圖示範:
- 信任開啟檔案,選擇
Yes, I trust,如下圖示範:

- 新增文件
test.cpp,如下圖示範:
In VSCode: Exploer -> New File
輸入 test.cpp
在文字輸入區輸入以下程式碼
#include <iostream>
#include <vector>
#include <string>

using namespace std;

int main()
{
    vector<string> msg {"Hello", "C++", "World", "from", "VS Code", "and the C++ extension!"};

    for (const string& word : msg)
    {
        cout << word << " ";
    }
    cout << endl;
}
- 在第 9 行左側按下去,會出現紅點,如下圖示範:
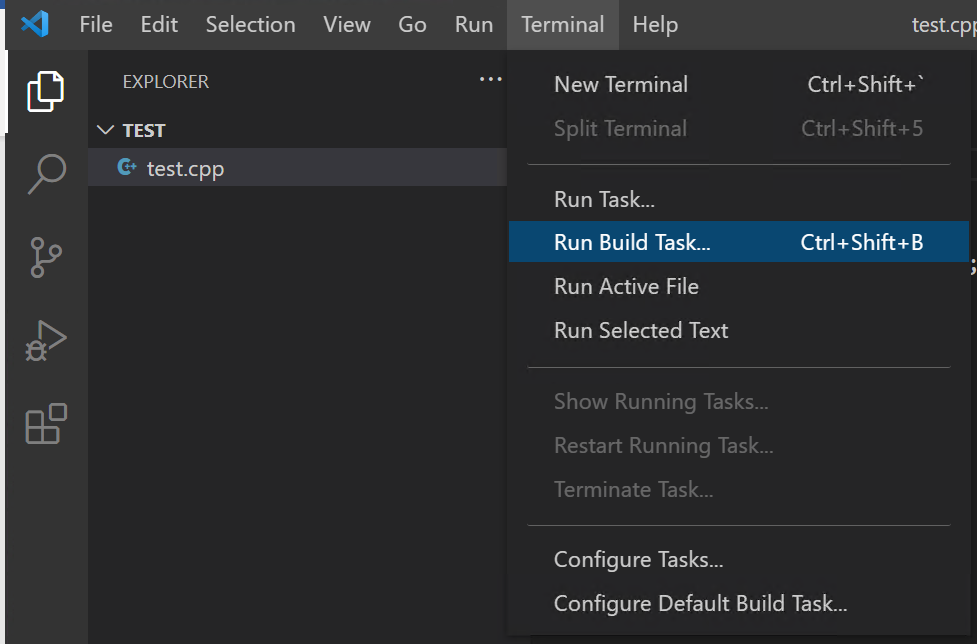
- 按下
ctrl+shift+B按鍵,或上方terminal -> Run Build Task,如下圖示範:
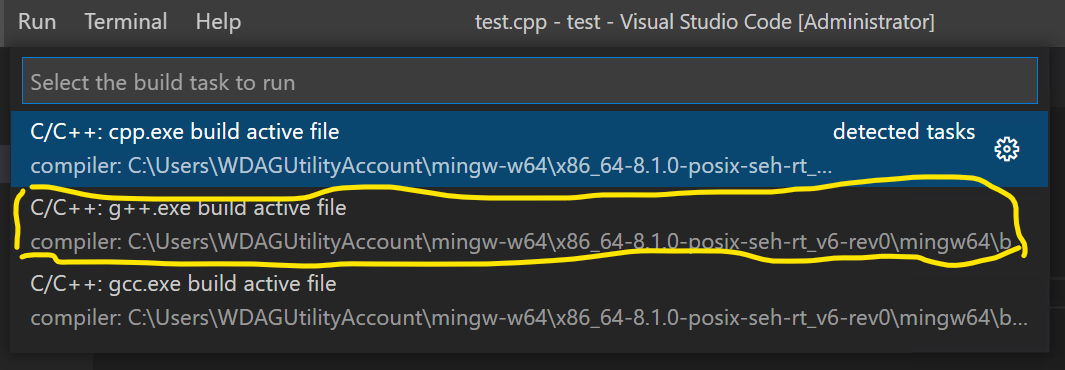
- 此時上方會出現以下畫面,選擇中間選項使用 g++ 編譯檔案,如下圖示範:
- 設置正確的話,此時下方會出現編譯成功完成的提示,如下圖示範:

測試除錯
-
完成前項
測試編譯的所有流程 -
按下左方三角形按鈕後選擇
Run and Debug,如下圖示範:

- 此時上方會依序出現相關提示,選擇預設的即可,如下圖示範:


- 若設定正確的話,會看到程式停留在選取的第 9 行,如下圖示範:
Reference: